Setting up the VNC Server in Mac OS X 10.6
A VNC server is included in every edition of Mac OS X, including Mac OS X 10.6 - aka Snow Leopard. You can start the server through a hidden check box in the Sharing preferences.
A VNC server is included in every edition of Mac OS X, including Mac OS X 10.6 - aka Snow Leopard. You can start the server through a hidden check box in the Sharing preferences.
This article refers to Mac OS X 10.6, aka Snow Leopard. More recent versions are available on our VNC on Mac OS X page.
A VNC server lets you control your Mac from another computer using the VNC protocol. With recent editions of Mac OS X, Apple has moved to a more sophisticated method of screen sharing. However, a traditional VNC server is still included but is turned off by default.
Starting the Mac OS X VNC Server
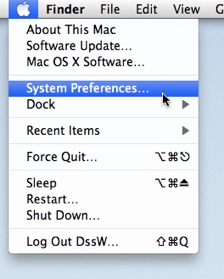
Launch the System Preferences.

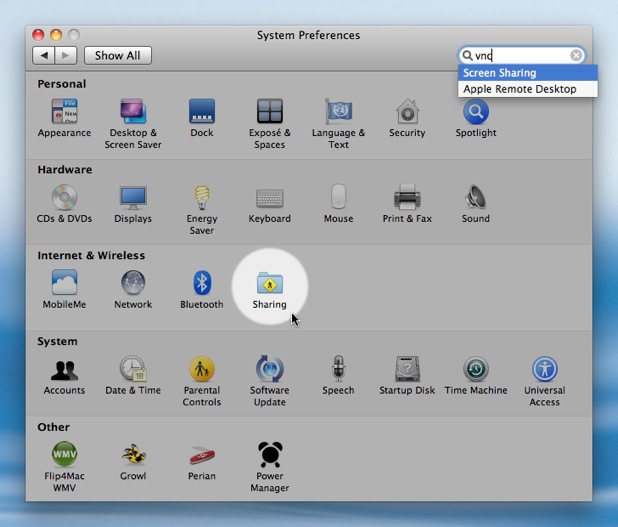
Select the Sharing preferences.

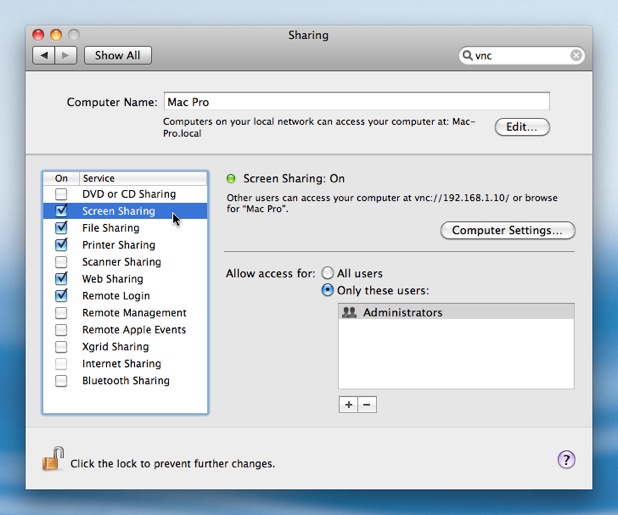
Enable Screen Sharing within the Service list.

Click Computer Settings… to show the VNC password setting.

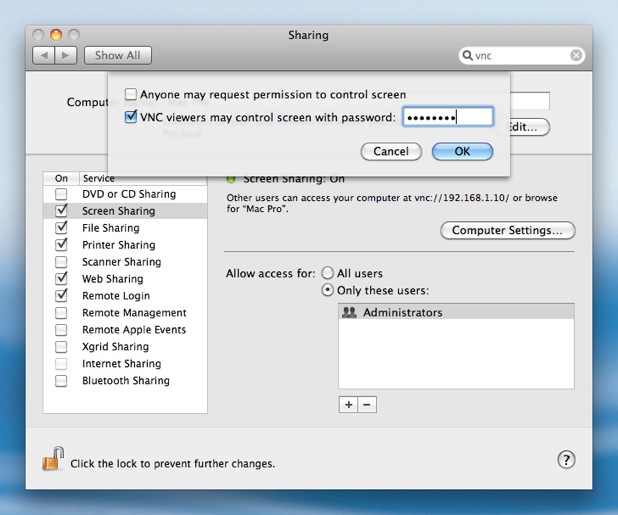
Enable VNC viewers may control screen with password:.
Enter a strong password.
Click OK to save your settings.
Your Mac is now running a traditional VNC server. You can now connect to your Mac using a VNC client running on another Mac, Windows, or Linux computer.