How to Use iCal to Run an AppleScript
You can use Mac OS X's iCal to automatically run an AppleScript on a particular date and time. You can use this ability to send e-mails, interact with applications, and perform tasks without needing anybody around to oversee the work.
You can use Mac OS X’s iCal to automatically run an AppleScript on a particular date and time. You can use this ability to send e-mails, interact with applications, and perform tasks without needing anybody around to oversee the work.
![]()
Let’s ask iCal to run an AppleScript on 10 March 2011 at 10:00 am.
Open iCal: Applications > iCal
Navigate to the month of March.
Click on the 10th March to select the day.
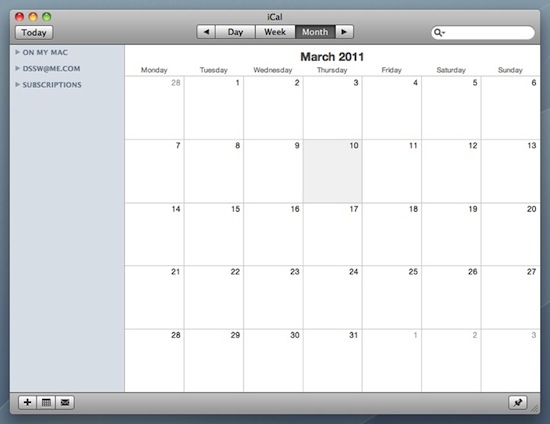
Create a new event on the selected day: File > New Event
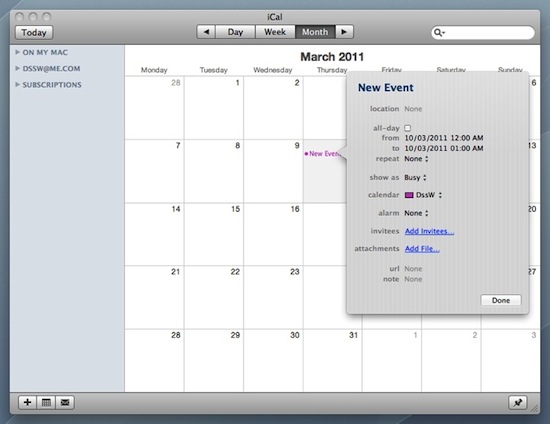
A New Event panel will appear; in this panel:
Change the from and to dates to 10:00 am.
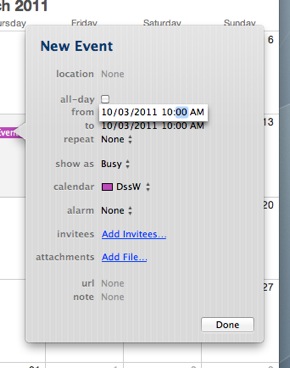
Click on the None next to the alarm label.
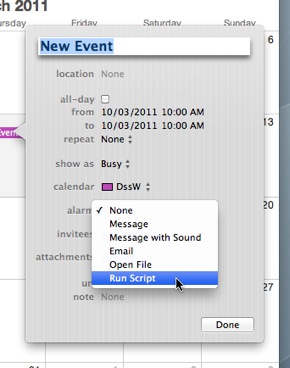
Select Run Script from the alarm menu.
An open dialog will appear; select the AppleScript to run.
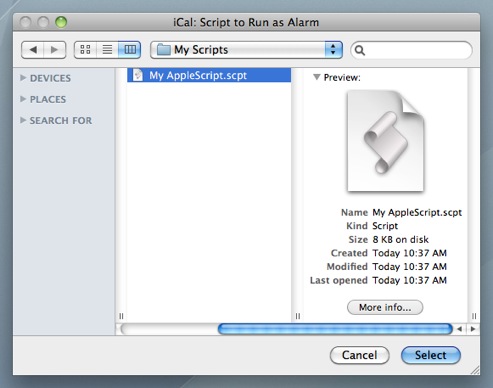
Once an AppleScript is selected, two new items will appear next to the alarm label: (name of the AppleScript) and 15 minutes before.
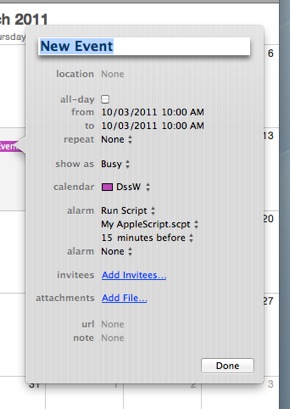
Click on the 15 minutes before, a little below the alarm label.
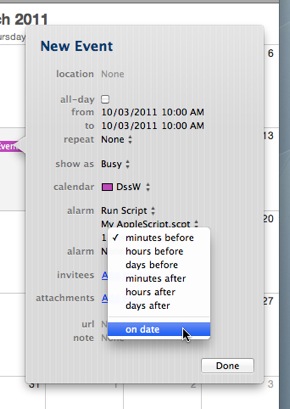
Select on date from the menu.
A new date and time control will now appear. Change this date and time control to 10:00 am.
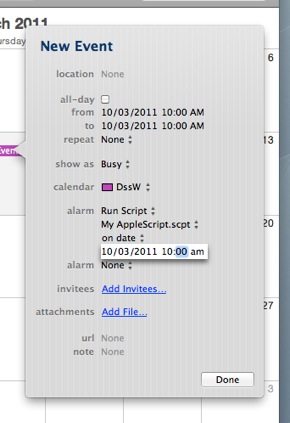
Click Done to finish editing the event.
Your new event is now scheduled.
There are a couple of notable limitations to using iCal as a scheduling tool:
- You must be logged in for the AppleScript to run.
- Your Mac must be powered on and awake when the event is due.