Setting up the VNC Server in Mac OS X 10.7 aka Lion
A VNC server has been included with every edition of Mac OS X, including Mac OS X 10.7, aka Lion. Let's walk through how to start the server on Lion.
A VNC server has been included with every edition of Mac OS X, including Mac OS X 10.7 – aka Lion. Let’s walk through how to start the server on Lion.
This article refers to Mac OS X 10.7, aka Lion. Other versions are available on our VNC on Mac OS X page.
VNC is an acronym of Virtual Network Computing. You can use your Mac’s free VNC support to remotely connect and control your Mac over a network. You can even control your Mac remotely over the Internet.
In Mac OS X 10.5, aka Tiger, Apple introduced Screen Sharing to the Finder. While Screen Sharing appears to be built on VNC, it uses a more sophisticated authentication process that stops most generic VNC clients connecting.
To start a general VNC server on your Mac you need to click a few check boxes.
Starting the Mac OS X 10.7 VNC Server
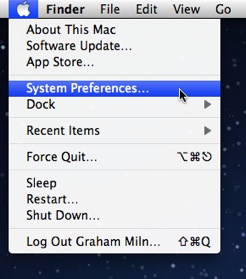
Launch the System Preferences.

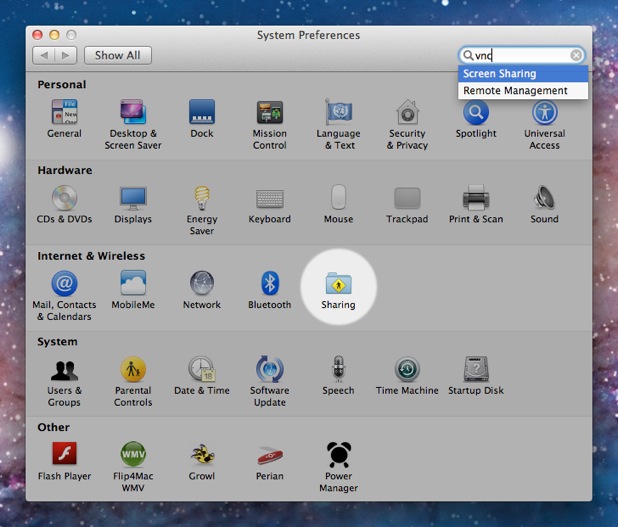
Select the Sharing preferences.

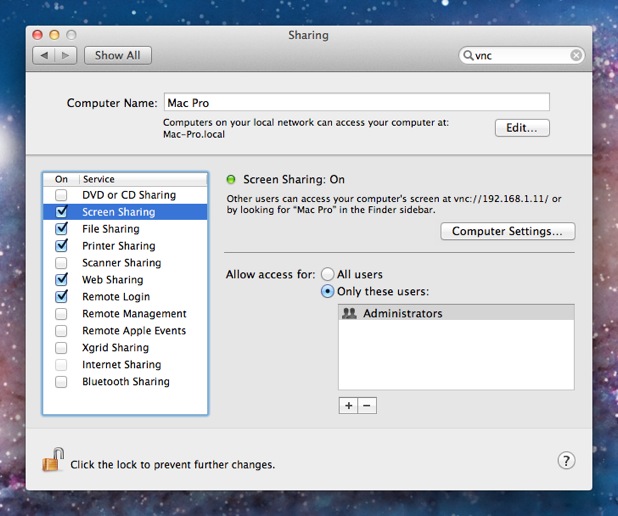
Enable Screen Sharing within the Service list.

Click Computer Settings… to show the VNC password setting.

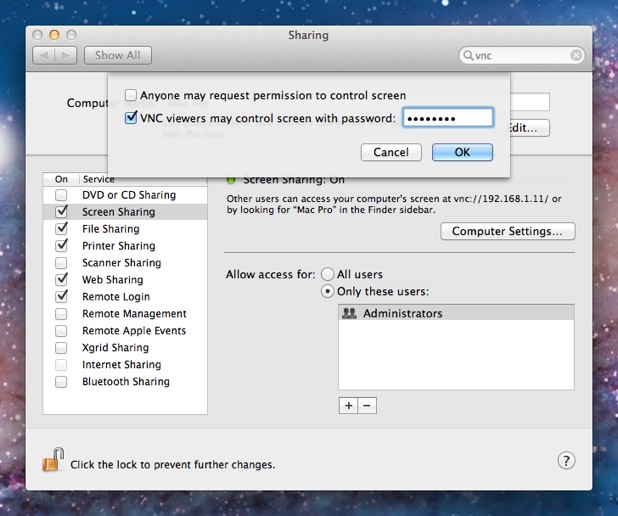
Enable VNC viewers may control screen with password:.
Enter a strong password.
Click OK to save your settings.
Your Mac is now running a VNC server and can be connected to from other computers using the standard VNC port (TCP/IP port 5900). Those connecting will need to use the password you entered in step 6.
The VNC server will start every time you power on your Mac. If you want to stop the VNC server, navigate to the Sharing preferences and disable Screen Sharing.