Setting Up glacier-cli on Mac OS X
glacier-cli is a command line tool for Amazon Glacier. This article walks through how to set up this tool on Mac OS X 10.8.
glacier-cli is a command line tool for Amazon Glacier. This article walks through how to set up this tool on Mac OS X 10.8.
Glacier a service from the Amazon Web Services (AWS). Glacier is a long term storage service designed for keeping large amounts of your information safe for long periods of time.
We have previously mentioned how important regular back-ups are. Amazon Glacier adds another welcome option into the mix. To use Glacier, you will need an existing AWS account or will need to create one.
glacier-cli is written by Robie Basak and provides a command line interface (cli) for sending and retrieving files from Glacier. The installation requires a few steps because of dependencies.
![]()
Access glacier-cli through Terminal.app
Install glacier-cli
We are going to create a single folder containing all the Glacier related files and scripts. You can store this folder anywhere you want on your Mac; these steps will place it into your home folder.
Launch Terminal.app and create a new folder called glacier with these commands:
mkdir ~/glacier
cd ~/glacier
Install the latest boto and glacier-cli projects:
git clone -b glacier git://github.com/boto/boto.git
git clone git://github.com/basak/glacier-cli.git
ln -s ../boto/boto glacier-cli/boto
glacier-cli requires two python modules not included with Mac OS X 10.8. Install these modules next:
sudo easy_install iso8601
sudo easy_install sqlalchemy
Note these modules will be installed using administrator rights and will be available computer wide.
AWS Credentials
Before you can start using Glacier, you will need credentials with Amazon Web Services (AWS).
If you need an account with AWS, sign up at Amazon Web Services.
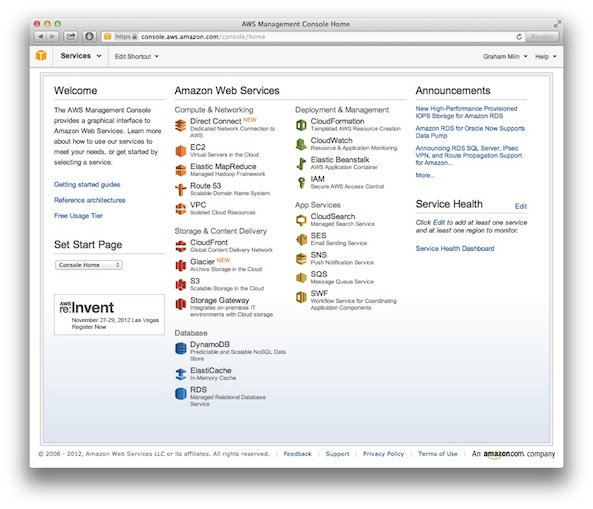
If you have an existing account, or have just opened an account, visit your AWS Management Console.

Visit your Amazon Web Services Management Console
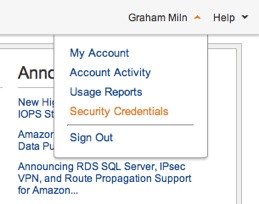
- Navigate to your account’s Security Credentials page.

Navigate to your Security Credentials
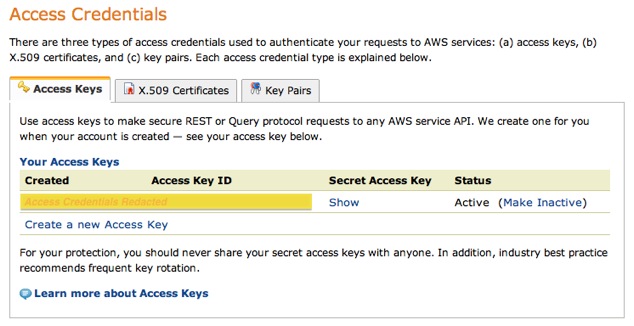
- Under the Access Credentials section, note the Access Key ID and Secret Access Key.

Note your Access Key ID and Secret.
These credentials will be needed in next step.
Configure Boto / AWS
The next step is to tell your Glacier aware software about your access credentials. This information is needed to allow the software to manage your Glacier files.
Within Terminal.app create a hidden file in your home folder called .boto:
touch ~/.boto
open -b com.apple.TextEdit ~/.boto
Boto is the name of the python library used by the glacier-cli tool.
Add the following contents to this file:
[Credentials]
aws_access_key_id =
aws_secret_access_key =
Make sure the file is saved as a Plain Text File. You may prefer to use nano or another third party text editor such as BBEdit.
For more information about the possible contents of this file, see BotoConfig.
Testing glacier-cli
You have now installed Glacier aware software and set up your Amazon Web Services credentials. You should be ready to start using glacier-cli.
Let’s try listing the available Glacier vaults. A vault is the name of storage container within Amazon Glacier.
Using Terminal.app change into the glacier-cli folder:
cd ~/glacier/glacier-cliIssue the glacier-cli list vault command:
./glacier.py vault list
If all goes well you should see nothing; no errors and no warnings means success. This assumes you have not yet created any vaults; otherwise your previously created vaults should now be listed.
glacier-cli is now ready to use on your Mac.